Last time, we took a look at the stock JG BAR-10 G-Spec airsoft sniper rifle. We found it to be a terrific base platform for pickup games – especially in SoCal where our sniper FPS limits are usually 450 FPS with .20g BBs. Thanks to the folks at AirSplat, we are now going to install some upgrade components into the rifle to see what we can do with it. Again, as we are in Southern California, we have to keep our sniper rifles to 450 FPS or less with .20g BBs, so we were going to focus more on reliability and longevity rather than pure velocity.
Here is a full list of upgrade components that we used in this upgrade:
- Action Army VSR-10 Airsoft Cylinder
- Action Army Airsoft VSR-10 Trigger Set
- Angel Custom PSS10 Steel Bolt Handle for VSR-10 Airsoft Sniper Rifles
- Action Army Spring Guide for Marui VSR-10
- Action Army Reinforced Piston for Marui VSR-10
The first part of our upgrade was the teardown process. This is basically where we take the constituent components out of the JG BAR-10 G-Spec in preparation for the installation of the upgrade components. I HIGHLY recommend that when you remove a part from the rifle, place it in a workspace close to other pieces of the same component (e.g. All hop-up pieces together, all trigger box pieces together, etc). You will be dealing with some super-small screws and springs and it is very easy to lose them – especially when your workspace is covered in rifle parts.
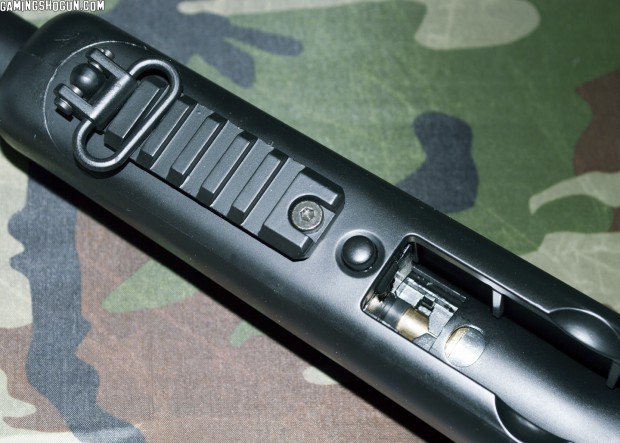
The next tip to pass on to you is that in order to remove the barrel assembly from the body and stock of the rifle, you will need to remove two screws. The first one is easy to find and sits behind the area of the magazine well. The second screw is located next to the magazine release button and also works to hold the front rail into place – you can see it in the photo above. Once those to screws are removed, slowly pull the barrel up from the muzzle end out of the body until it slides out. A little bit of resistance is to be expected – so take heart if it just doesn’t slide out like a hot knife through butter.
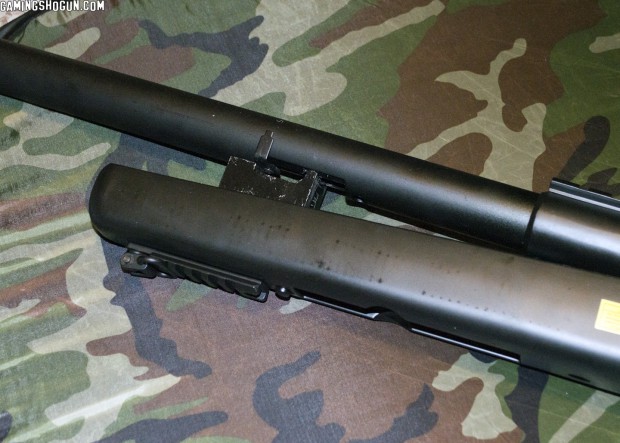
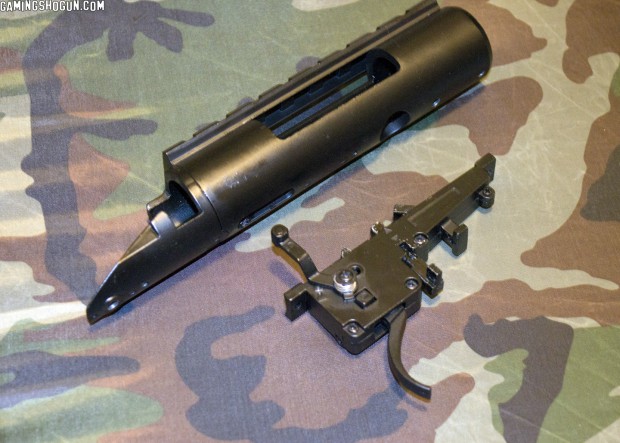
This image shows the rifle barrel as it is pulled from the body. As you can see, there is a metal block attached to the barrel under the hop-up as a stabilizer. This is one of the objects that snags a big as you remove it from the rifle body. The rifle body is a polymer so it flexes as the barrel is removed, so be firm but gentle in handling them and the should separate without issue. The next part of the process is removing the rear outer barrel assemble from the inner barrel assembly so we can more easily access our cylinder and other internal components. This is done by removing two small screws where the two pieces come together, then simply unscrewing them.
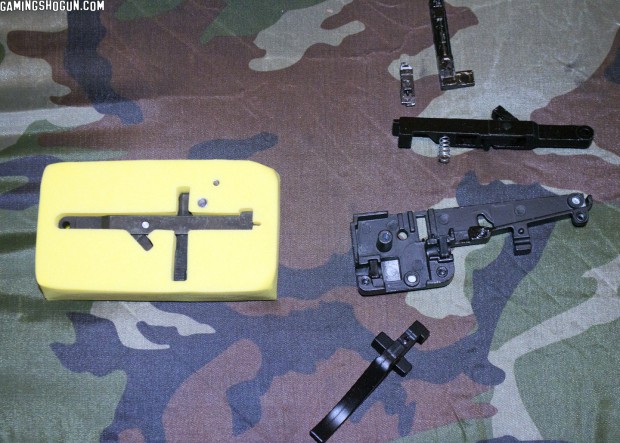
Now you can remove the trigger box followed by the cylinder assembly. After this is complete, pull the cylinder out of the breach via the bolt handle and you can begin working on replacing the sear and other components of the trigger box. As noted in my review of the stock rifle, the trigger box in this rifle is made from metal, so it already has some reinforcing. Removing the trigger box from the rifle is easy – just unscrew the three screws holding it into the bottom of the barrel. Then carefully pull it out. In order to take the trigger box apart and get to the internal sear, you simply need to unscrew the various screws from the side of the trigger box. You can see some of those screws in the image above.
After you have separated the trigger box, you can remove the existing sear set – just watch for a couple small springs that are to be found within. The replacement set from AirSplat does come with these springs, but they are easy to lose and you can never have enough replacement parts just in case! Upgrading the trigger box was definitely the most daunting part of the process, just because it was something I had not ever tried before. Thankfully, it is a lot easier to figure out than it looks. It should be noted that the cylinder set pin included with the Action Army trigger sear set was too thick to actually fit all the way in the trigger box once it was put back together. So, I had to use the stock set pin – not the worst thing in the world especially with the mild stresses that will be put on the assembly.
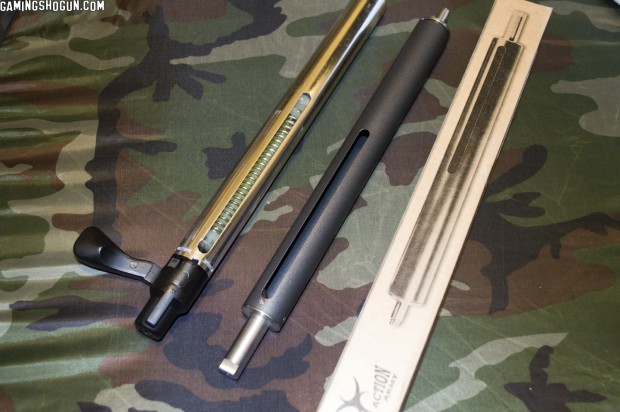
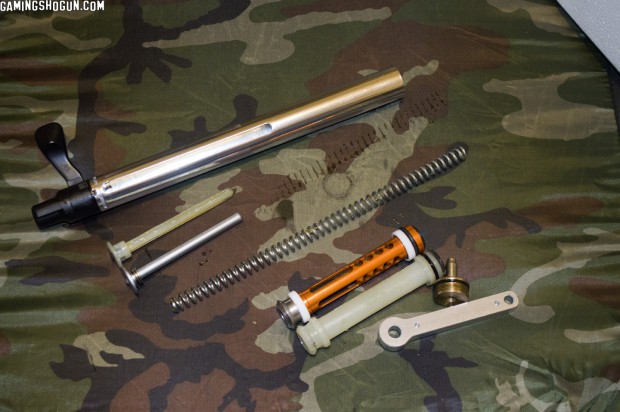
Moving onto the cylinder assembly, above you will see a comparison image between the stock JG BAR-10 G-Spec cylinder and the Action Army Teflon-coated one. Well, there were some issues with this part of the upgrade. First, the metal rod which the bolt handle sits on was too thick for the stock rifle bolt handle. I could have bored out the bolt handle but I don’t have the tools required to do so. Instead, I picked up an Angel Custom bolt handle which fits onto the new cylinder without trouble. Internally, the Action Army spring guide and the Action Army piston both fit into the new cylinder without trouble. Something you need to make sure you do is add lubricant inside the cylinder. Now, there are several opinions on what kind of lubrication to use – with options ranging from lithium grease to dry lubricant, etc. Here’s the thing – the rubber gaskets on the piston need to stay lubricated, so I recommend simply using some silicone grease along the inside of the cylinder. Once your cylinder is put back together I also sprayed some silicone spray lubricant inside for added measure. Be careful your silicone spray doesn’t contain any strange additives. It should JUST be the silicone itself.
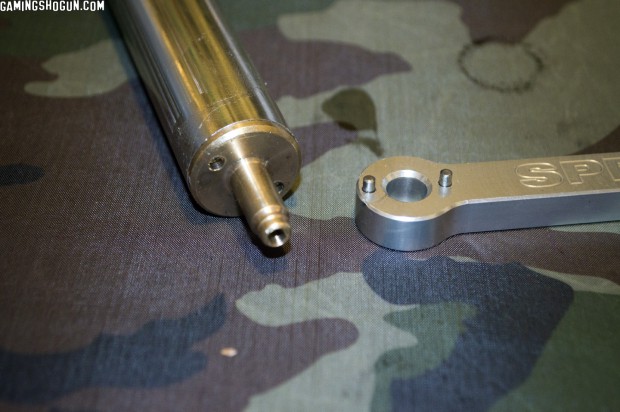
In case you’re wondering how I opened the cylinder in the first place, not to mention tighten it back on again, I used a Speed Airsoft M24/VSR-10 cylinder tool. This makes the process exceedingly simple to get into the unit and change out pieces. You could also use a couple of Allen wrenches or even needle nose pliers. However, I prefer the Speed Airsoft tool. Be careful when opening and closing up your cylinder that you carefully make sure the previously-mentioned piston gasket doesn’t come loose or get caught on the lip of the cylinder itself. You can google search for the tool – I found mine on eBay.
Above you will see a shot showing off the before and after parts I installed into the cylinder (the new Teflon-coated cylinder is not shown). As you can see, changing out those plastic pieces for metal should add a ton of longevity to the internals of this sniper rifle. The piston is very lightweight for being CNC’d aluminum as is the spring guide. For this upgrade, I used the stock cylinder head.
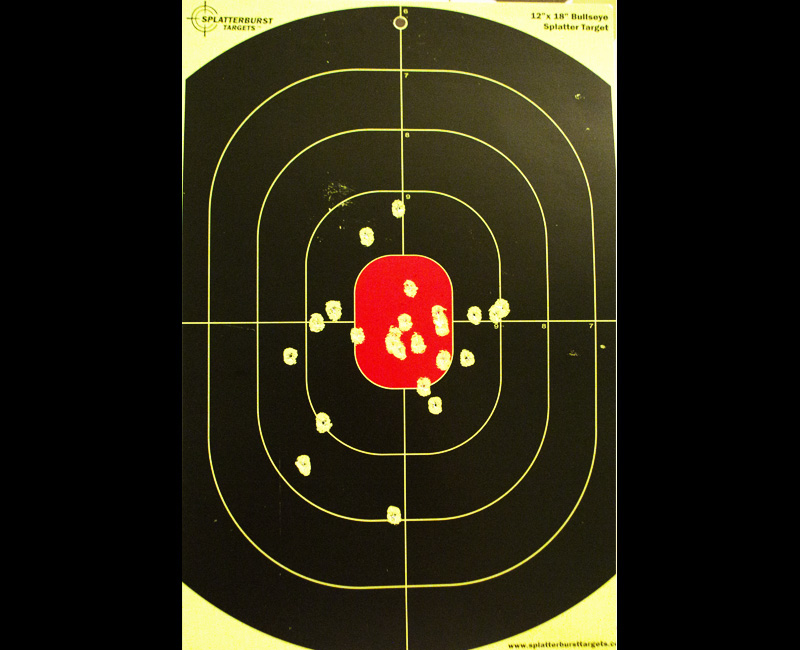
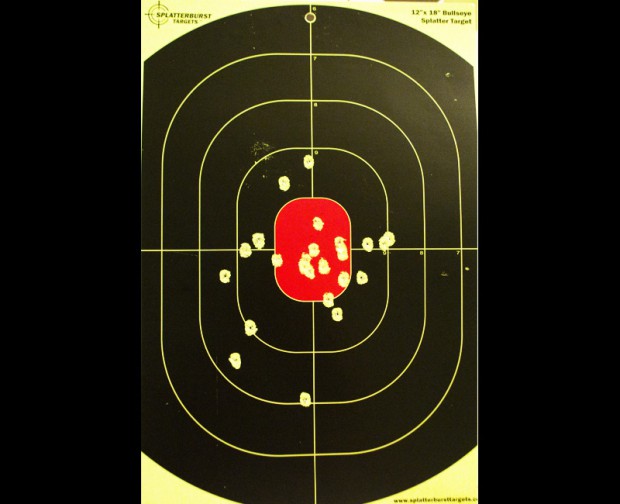
After I put everything back together, I made a point to slowly pull the bolt back for the first few times in order to move all the lubricant around inside the cylinder. You want maximum lubrication to keep everything sliding as needed. The first thing I noticed was how different the rifle sounded after the upgrade. It actually quieted down a lot once I ran it through a few magazines to break in the parts. I wasn’t after sound, however, I needed results. So, I took the rifle out to the range again and ran it through the same test I ran the stock build through. The differences are very apparent in the tale of the target paper.
Tests at 100feet
Interestingly, once everything was installed we got a slightly lower FPS rating out of the build. In this upgraded rifle, we shot it through our trusty chronograph and got ratings of approximately 397 FPS with .25g BBs. This means the upgraded sniper dropped by roughly 10 FPS over the stock build. This, of course, is because we are using the same spring as in the stock version. This spring now has to stand up against heavier, metal components. Thanks to the upgraded parts, however, we can now put a heavier spring inside of the rifle – pushing the FPS up to high limits – but, again, we still have to observe the Southern California field limit for sniper rifles.
If you would like to watch a great video of these kinds of upgrades being installed, here is one from the master airsoft sniper Novritsch:
Overall, we are very pleased with how the upgraded JG BAR-10 G-Spec build turned out. The rugged internals should last a long while with proper care and maintenance. This also gives us a great setup for when we want to take the rifle out to games with higher sniper rifle FPS limits. The metal piston, spring guide, and sear set will take a much stiffer spring now. Again, we would like to thank AirSplat for sending most of these parts our way for this article.
You can see the stock rifle review here!
[easyreview title=”JG BAR-10 G-Spec Airsoft Upgraded Sniper Rifle Review Score” cat1title=”Overall Score (out of 5)” cat1detail=”” cat1rating=”5″ ]
[button target=”_blank” style=”” link=”http://gamingshogun.com/gamingshogun-rating-system/”]Learn About Our Rating System[/button]

