Author - Jerry Paxton

Imperium Romanum Review

Gameplay: The player can select from a few different gameplay types in Imperium Romanum. The first missions are called ‘Scenario’ missions and puts the player into the, yup – you guessed it, scenario of their choosing. These missions are open-ended, varying by what geographic location you start at, how many barbarian tribes are present and what their status towards you is. These missions are rated by difficulty and are a good way for the player to explore the different aspects of the game.

The ‘Timeline’ missions are a tree-based set of missions taking the player to different places during the age of Rome, starting with the initial settlement of Rome in 509b.c. In this gameplay mode, you select up to three different tablets (basically objectives) at a time. As you complete these objectives, you go through the tablets until they are gone. At that point, you have won the scenario and can move on to the next missions in the tree, slowly progressing forward through time.

The ‘Rome’ mode starts the player off in charge of the fledgling city of Rome and uses the tablet system to give the player objectives. In this mission you basically just grow the city of Rome into its full glory, overcoming various obstacles in the way.

City-building games have been around for a while now, so I am sure you can gather the basics: build homes, water sources, farms, stores, etc. However, unlike the Caesar games, Imperium Romanum is much more forgiving on the player. Figuring out what citizens need in a certain area is done easily by clicking on them. Every building also has an ‘effect radius’ which displays when it is clicked. This shows the player the building’s reach without external help. For instance, butcher shops need to be built within the effect radius of a pig farm in order to receive meat. However, this range can be extended by the use of slaves and warehouses that can carry the meat greater distances. Employment is a huge part of Imperium Romanum as every building needs workers, which are hired from houses within the buildings effect radius. A mine far from your town will need a house or two near it (along with a water source) in order to be staffed. This is where the advanced planning of your city comes into play.

Roads do not seem to serve a functional purpose in Imperium Romanum, save for displaying the quality of the area they are laid. They become paved when the surrounding area reaches a certain level of affluence. Aside from this and helping line up buildings, they are not used by units to travel more quickly or anything like that – strictly eye candy. Thankfully, it is free eye candy – roads cost nothing and are built instantly.

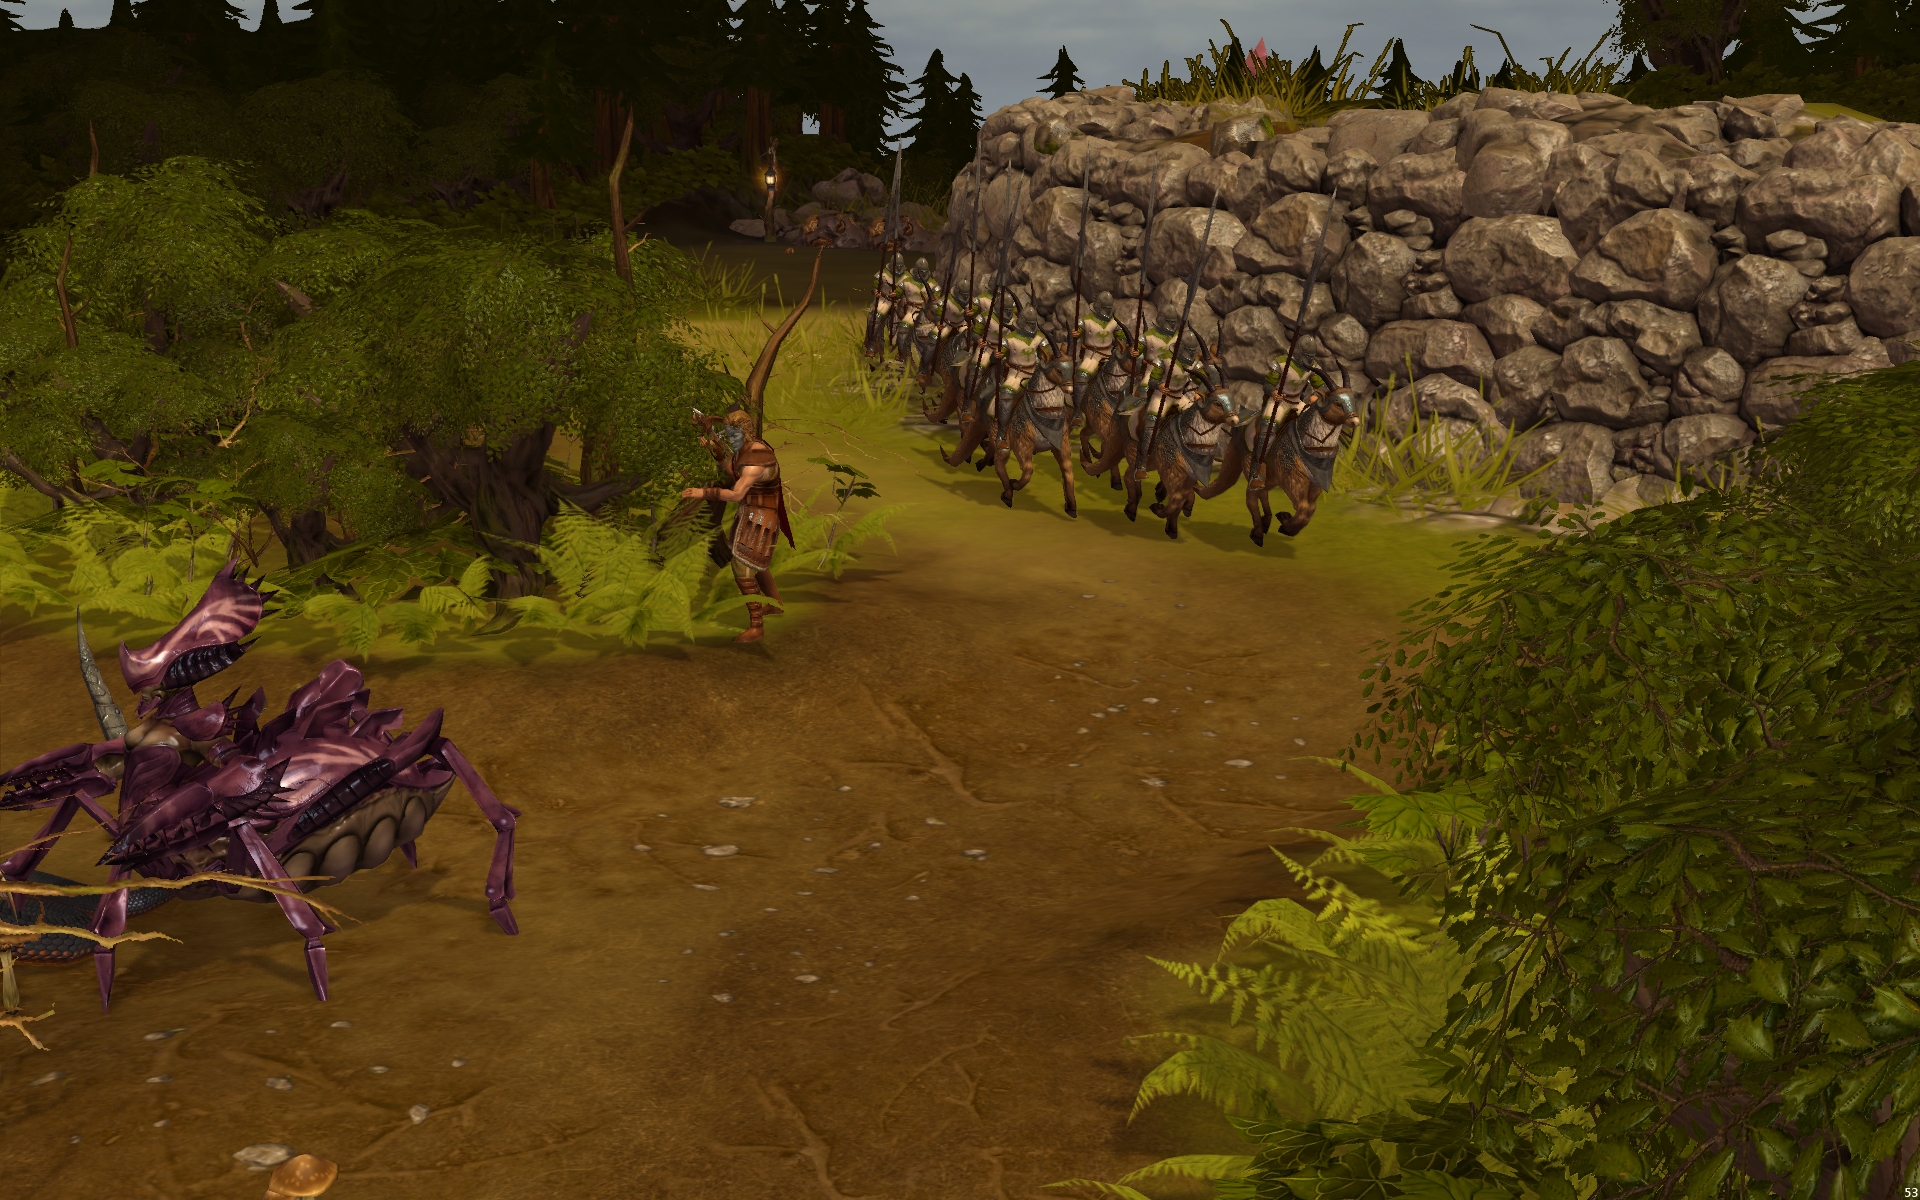
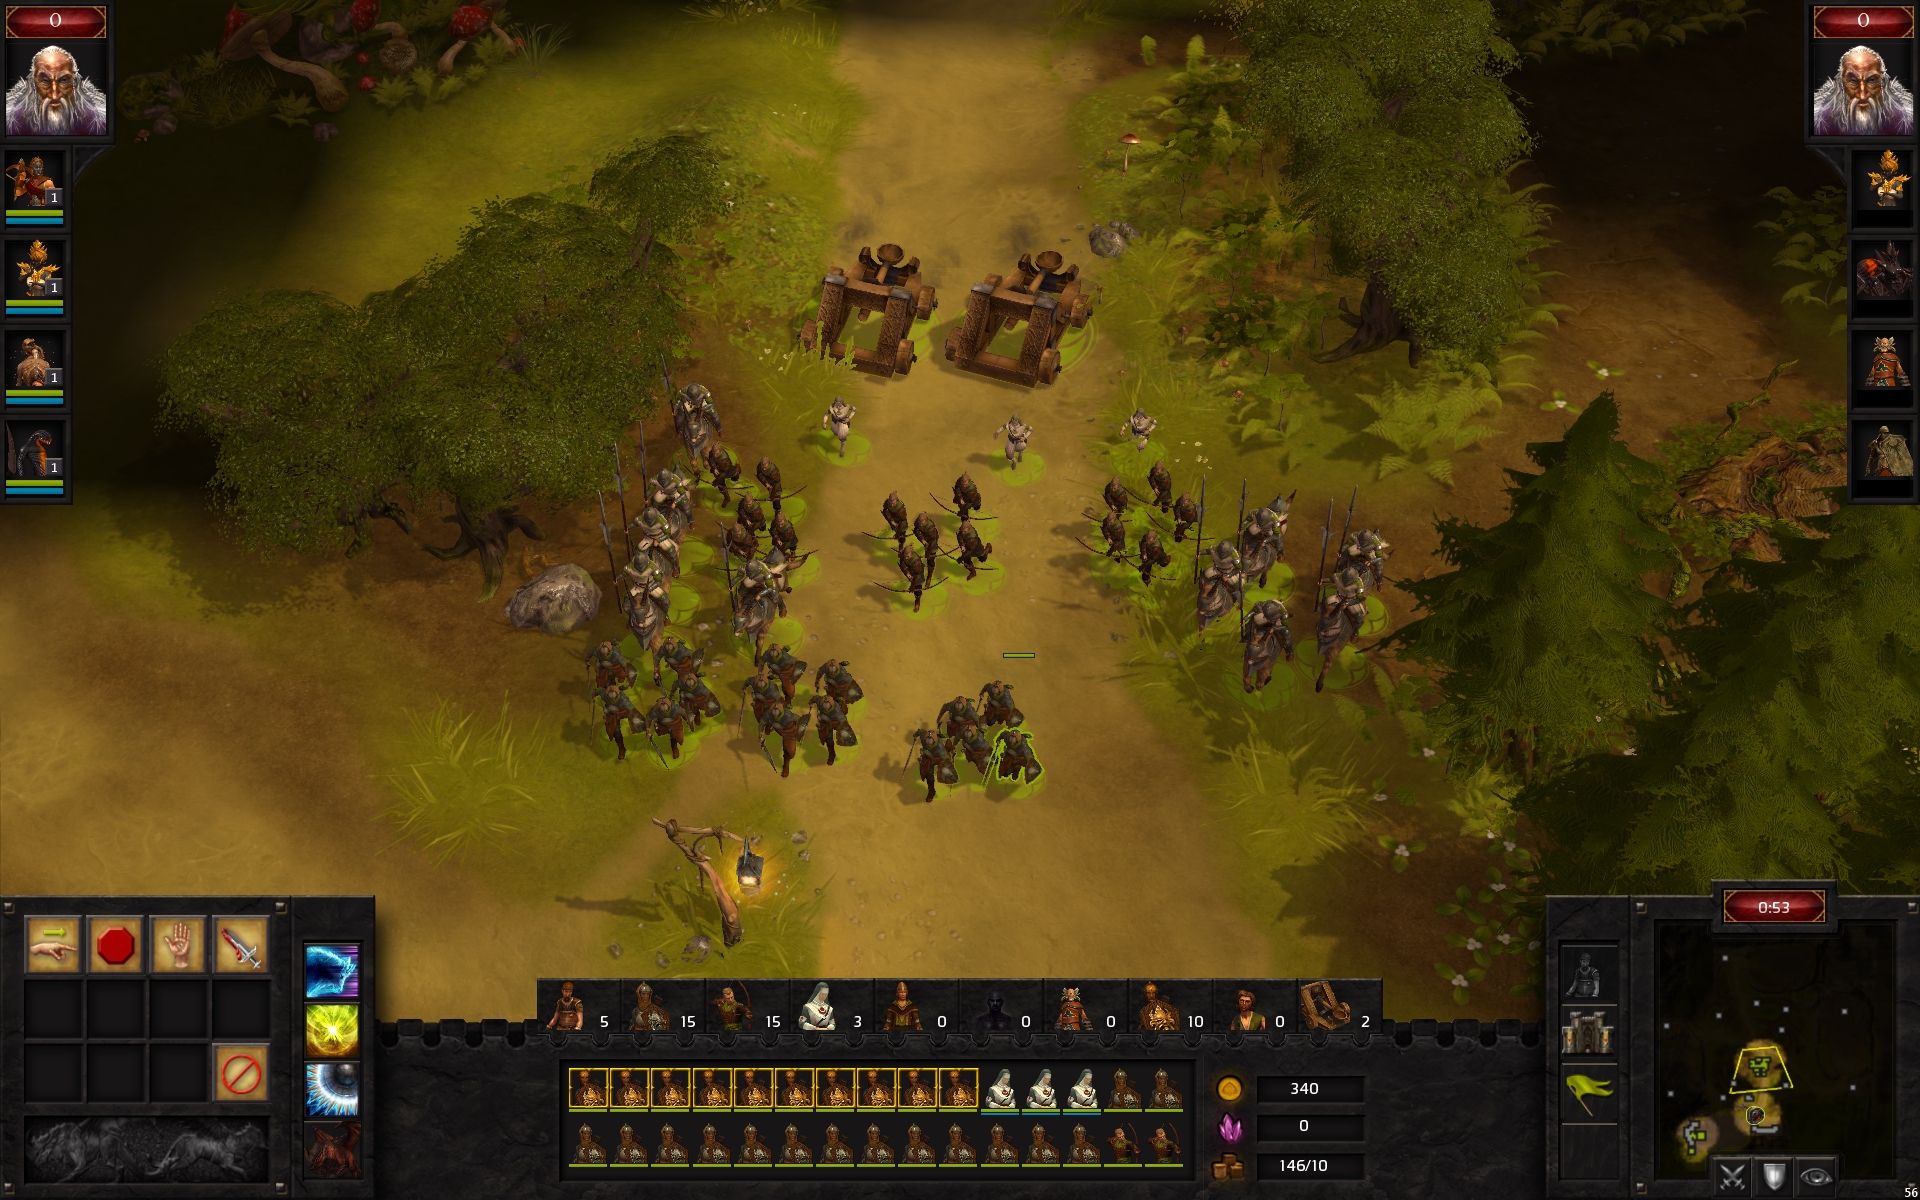
The weakest feature of the title is the combat. There are three different unit types at your command: infantry, archers, and mounted units. A fully-stocked unit consists of 36 troops and one of these groups will hail from each barracks, archery, or equestrian training building. Thats right, just one. If that building’s platoon is defeated in battle, any remaining troops must run back to their respective barracks to slowly rebuild their numbers. Commanding military units is simply a matter of clicking where you want them to go, although they do have a max-commandable range where supplies from your nearest building will not reach them and you cannot move them past this range. However, once they are in position, you can order them to attack which sends the group after the nearest barbarian camp. Combat, aside from positioning and a few basic formations, is pretty much on autopilot. It adds an additional layer to the gameplay but isn’t quite interesting enough to hold your focus for very long.

Graphics: Imperium Romanum features crisp and visually pleasing graphics. The environments are very well detailed with trees, weather effects, and water. The buildings are really where the game really shines though as structures have been modeled and textured very nicely. Citizens and units are the weakest part of the visuals as they usually have a much lower polygon count and texture resolution.

Sound / Score: The sound in Imperium Romanum is average and we have no complaints to speak of on that point. The musical score is nicely arranged, however, and adds alot to the gameplay with its sweeping melodies.

Conclusion: While combat is somewhat lackluster in Imperium Romanum, the city-building aspect of the game is fun and engaging. It should satisfy the ancient city planner in you for quite a while. In addition, Imperium Romanum features nicely done graphics while not being a strain on most computers, so it is accessible by virtually anyone thanks to that and its easy learning curve when compared to other city-builders out there.

Overclocked: A History of Violence Review

The adventure game genre has really taken off in the last few years. Of course, as an older gamer I remember playing some early adventure games as a kid. Titles like Police Quest and Leisure Suit Larry (Remember those lame questions they used as age protection?) really shaped what an adventure game should be in my mind. So, I tend hold modern adventure games to a stricter standard than the youngsters out there! Some times I find some bad ones…and other times I find some good ones.

Lighthouse Interactive gas recently published Overclocked: A History of Violence, created by German developer House of Tales. Overclocked puts the player in the role of Dr. David McNamara, an Army Psychiatrist sent to a mental hospital on Staten Island in New York City, to determine the cause behind the seemingly out-of-nowhere psychotic behavior of five young individuals. As you might have guessed, the truth is something that you don’t expect to be the case and, without spoiling anything regarding the game’s plot, it really is a thrilling ride.

Gameplay: The game, I am happy to say, is actually a fairly simplistic adventure title in design, which might sound like a negative, however this really allows the player to enjoy the story being presented and not get mired down by pointless puzzles. Moving the good doctor around is done simply by clicking on a location or object you want him to move to or use. At the bottom of the screen are the player’s inventory items all laid out for easier access. Items can sometimes be added to one another inside the inventory area and can also be selected for use in the game world.

One of the big plot devices in Overclocked is that you will ‘jump’ into other character’s shoes to relive their past events. These past events are all intriguing and, sometimes, just plain creepy! However, these change-ups to the flow of the game really do keep the story moving and interesting.

The only complaint I have regarding the gameplay system is that the event-triggering in the game is a bit too linear at times. For instance, at the end of a day I tried to call one of the contacts listed in Dr McNamara’s PDA-phone. He didn’t answer the call and wouldn’t until I was back in the hotel room. This inflexibility can lead the player to wander around for a bit until they perform the correct action at the correct location.

Graphics / Visuals: Visually, the graphics in Overclocked are pleasing to the eye and have just enough ‘chutzpah’ to keep it interesting. This is no simple 2D adventure game. House of Tales has done a great job integrating 3D models and 2D elements. They also implemented a facial animation system which really helps sell character’s emotions. Environmental effects such as rain are also done very well and give Overclocked a very organic feeling.

Additionally, the in-game camera performs various ‘Hollywood-style’
transitions throughout the course of the game, adding to that
‘cinematic feel’ the title is ripe with.

Sound / Music: The sound design is well done in Overclocked and the environmental visuals would be much less interesting without the ambient noises to go with them. The voice acting in the title is average, with some cheesy dialog scattered in every so often but otherwise enjoyable. Additionally, the score of Overclocked is exactly what you would expect to hear in any Hollywood psychological-thriller movie. It dances from the eerie all the way to the truly anxiety-ridden.

Conclusion: The atmosphere created by the graphics, sound, and story all combine wonderfully in Overclocked: A History of Violence. This game is a must-play for adventure game fans out there looking for an engrossing experience. There are definitely alot of modern features in the game while at the same time it holds on to the basic tenants of adventure gaming set forth so long ago by the classic titles I mentioned at the beginning of this review.

Torque X 2 Engine Released

GarageGames has released Torque X 2.0, the latest update to its Torque X game engine which is now compatible with Microsoft’s XNA 2.0 standards.

Official Release:
GarageGames, the leading technology provider for independent game developers, has announced the release of Torque X 2.0. This release updates the Torque X engine for compatibility with Microsoft’s XNA 2.0 Framework and improves the engine’s performance in 3D environments.

Originally launched in the summer of 2007, Torque X has gone from a 2D-only engine to a full-featured 3D game engine. It now provides chunked LOD terrain with clip map texturing, DTS Mesh Support, XNA Model Support, Torque’s custom material system, post processing, a 3D particle system, rigid body physics and collision, and built in components.

‘It’s amazing to see how far XNA development has come in such a short time. When we partnered with Microsoft to develop Torque X in 2006, the game development community was still pretty skeptical of managed code,’ said Brett Seyler, GarageGames VP of Business Development. ‘Last year’s Dream Build Play winners looked awesome and now with true, full-featured game engines to speed and ease development even further, I expect we’ll see Torque X and XNA game development really thrive in 2008.’

According to GarageGames, Torque X also supports the 2D drag and drop game creation features of Torque Game Builder. Torque X allows developers a chance to deploy and test their game on retail Xbox 360 units through Microsoft Creator’s Club.

Razer Lycosa Gaming Keyboard Review

I love gaming keyboards. Who would have though that keyboards would have become the industry they did? Before PC gaming became popular, they didn’t matter all that much and the design lacked innovation. Now, however, with gamers seeking every edge possible, companies have responded by creating keyboards specifically for their needs.

The Lycosa is Razer’s latest gaming keyboard following their Tarantula model. If the Tarantula were a Semi-Truck, the Lycosa would be a Corvette. Lycosa features a very low profile in comparison to most gaming keyboards. The outer casing is the same heavy black plastic (with a slick finish) as the Tarantula, although the attached wrist rest is a dull black. Unfortunately, the slick black plastic is prone to getting smudged with fingerprints but looks great when all polished up. Its keys are all rubberized. Yes, every single one and I didn’t think that would be all too important to me until I used them. The rubberized surface not only helps with grip but also comfort as the rubber helps absorb the shock on your fingers that is caused by typing. Razer has included a microphone and headset pass-through to the back of the keyboard as the did with the Tarantula. In addition, they have added one USB port pass-through as well. As an aside, the Tarantula had two USB ports on it.

Lycosa features a cool ‘TouchPanel’ media control area. It is a flat area with no raised buttons visible, and yet it can detect the slightest touch on its stenciled icons. This looks similar to the technology used in the Razer Mako 2.1 Desktop Audio System’s control pad.

Unlike the Tarantula, Lycosa is fully backlit, although the brightness of the backlighting could be a bit more intense and the stencils in the keys (which allow light through) could be a bit bigger. In the dark they seem a bit ‘muddled’ to get the maximum effect from. The light button in the TouchPanel has three settings. The first is off while the second setting lights up the WASD keys. The third lights up the whole keyboard. We did like the idea of the second setting, but in actual usage we found we just left it at the third setting mostly, so I don’t know how much use you will actually get out of that.

There are no specialized macro keys on the Lycosa like there are on the Tarantula, but via the ‘Lycosa Configurator’ software, any key on the Lycosa can have a macro assigned to it. This is extremely convenient as those dedicated macro keys on alot of gaming keyboards take a bit of getting use to. These keys are exactly where you expect them to be. The Lycosa can have up to 10 different profiles which can be switched between on the fly as well, which gives the keyboard a huge degree of key function flexibility.

Razer has engineered the Lycosa with its 1000Hz Ultra-polling technology which means there when a key is pressed, it takes just 1ms to reach the computer. Also, Razer has graced the Lycosa with the same ‘Anti-Ghosting’ feature as the Tarantula meaning the gamer can hold down up to 10 keys at a time without any interference between the keypress signals going to the computer. This essentially eliminates that awful ‘Sticky Keys’ window from popping up in Windows.

Using the Lycosa, we found the feeling of its key presses to be light, almost like a laptop keyboard but with a bit more ‘oomph’ (yes, that is the technical term). They produce a very nice tapping noise and, again, the rubberized keys feel very nice. We have used this model for everything from first-person shooters to real-time strategy games and, of course, general desktop app usage such as Microsoft Word. We haven’t found an application for which we did NOT like the Lycosa in.

Conclusion: Razer’s Lycosa is an incredible gaming keyboard with great looks, feel, and handling that is sure to give you the extra edge you need while in a tournament or just writing a report for school. It is well worth its $79 dollar price point.

*Note: Comparison image of Lycosa and Tarantula from ExtremeTech

Saitek X52 Pro Flight Control System Review

I will start by saying that I am a pretty huge flight sim enthusiast. I started a long while ago with the not-so-simlike F-19 Stealth Fighter title from Microprose. I moved on to bigger and more simlike games such as F-14 Fleet Defender, Falcon 3.0, and so on… During this time I moved from a 2-button CH Products flight stick to the more advanced controllers. It has been a joy over the years to see how the joystick has evolved into much more realistic peripherals for us ‘simmers’ to enjoy.

Recently, I was able to try out Saitek’s latest flight stick and throttle, the X52 Pro Flight Control System. Unlike their Pro Flight Yoke System, this controller is geared towards military simulations. The first thing that struck me were the cosmetic changes over the standard X52. Saitek has done alot in the way of making it more aesthetically pleasing. While the original X52 looked very futuristic with alot of silver coloring, the X52 Pro goes for a more realistic all-black design with military-style hats and metal toggle switches. In addition, the number of LEDs on the Pro unit have increased as well as the colors they can display. The original X52 could only display blue whereas the new unit can product red, green, and blue. and the first time you plug the system in you will definitely crack a smile at its cool-factor.

The X52 Pro Flight Stick:
The flight stick portion of the HOTAS system has been improved in several ways. In addition to the aesthetic changes previously mentioned, Saitek has doubled the number of magnetic sensors in the base unit to increase position sensitivity. They have added an extra spring to the base of the stick to increase the ‘return-to-center’ force of the stick the further it is moved. The stick still retains its ability to rotate (in case you are not fortunate enough to have rudder pedals) as well as its dual-action trigger and 5-position adjustable handle. I know it has been mentioned before, but one very cool lighting effect is when opening the ‘pickle button’ safety catch, that buttons light turns from green to a red – further indicating you are about to launch a deadly weapon. Not only does this look cool, but it also adds to the overall flight sim experience. It helps increase the immersion-factor, if you will.

The X52 Throttle Quadrant:
The throttle of the HOTAS system has not only undergone its aesthetic changes but also a big upgrade to its MFD system. One of the things that set the throttle of the X52 Pro and its predecessor apart from the rest of the HOTAS crowd was its LCD multi-function display(MFD) built right into the base of the unit. The new MFD can be modified to display in-game data via the SDK. While the SDK does have a learning curve, it would be well worth using as the MFD could display valuable information regarding your sim such as flight information, ammo status, distance to waypoints, etc. There is also an established mod community which has already created many MFD mods for various sims. The MFD also features two new rotary controls that can be used to interact with the display. The TQS (Throttle Quadrant System) also has much more pronounced throttle detentes as well as led lights that go from green to red when the afterburner-area is reached along the throttle base.

How does it play?
Normally, I use a more standard flight yoke inside Microsoft’s Flight Simulator X. However, for the purpose of this review I decided to go ahead anyway. After mapping the X52 Pro controls how I prefer, I began a series of small VFR (visual flight rules) flights around the Southern California area. The X52 Pro performed beautifully and without any concern. There were plenty of controls to make the flight fairly hands-free. After messing around in my Mooney for a while I decided it was time to get serious and started up Ubisoft’s Lock-On: Modern Air Combat. Again, color me impressed, as the X52 Pro Flight Control System performed wonderfully with whatever mission, campaign, or airframe I threw at it.

Conclusion:
The Saitek X52 Pro Flight Control System is, hands-down, one of the best flight control systems on the market today with a huge array of controls to configure, excellent design and styling, and an active mod community. If you can float the $199.95 dollar price point I HIGHLY recommend it to anyone serious about flight/air-combat simulations.

Wolfking Warrior XXtreme Review

Design / Construction: The Wolfking Warrior XXtreme is a very sweet-looking keyboard. Designed in a figure eight-ish pattern, the keyboard is separated into two key areas. On the left is the Warrior gaming pad, arguably Wolfking’s finest achievement to date. On the right side is a 40-key QWERTY keypad which is said to promote single-handed typing. The Warrior XXtreme is a small keyboard in contract to most on the market, measuring 16.4” inches long compared to the Logitech G15 which is 20.2” inches long. This small size helps promote mobility and will definitely save desk space for other peripherals if needed. Wolfking has built the Warrior XXtreme to rigorous standards and it shows, as the keyboard is very sturdy and solid. In addition, its rounded shape is very pleasing, making this one of the best-looking keyboards we have seen.

The unit comes with no additional software and does not have native macro or programmable key ability whatsoever. This is a shame as macro capability is almost standard on gaming keyboards these days and is sorely missed in this case.

On the top of the keyboard are additional controls mainly for media apps. However, the most interesting of these top-area keys is the ‘K-lock’ button. This control basically sends the ‘k’ key continuously to the current game. This is handy for games that use the ‘k’ key in order to send voice chat. Essentially, using this key is like constantly holding the push-to-talk button down.

The backlighting on the XXtreme is somewhat of a double-edged sword. On one hand you have this VERY intense blue light that makes the device look like TRON should have been typing on it at the IO Tower. High marks for aesthetics all around. However, the backlighting does not cut-through the keys in order to illuminate each key’s label. The lighting ends up creating a silhouette effect on the keys, and it is not easy to see the name of the button you are pressing.

The Warrior XXtreme does have two USB ports on the back-side of the keyboard, which I always rate high on my keyboard-wants list. Having the two USB pass-through ports decreases the amount of wires going to the back of the PC and increases your mobility during LAN tournaments.

Warrior Keypad: The 52-key Warrior gamepad area on the XXtreme is truly a thing of beauty. The most-used keys in FPS games have been all aligned together in a circular formation. The keys spaced much closer than they are on a standard keyboard layout, my fingers were able to hit all the important keys much more quickly. Usually my pinky has to work a bit to get to the left ctrl button. However, on the Warrior gamepad it is effortless. There is also a vertical space bar on the right side of the Warrior keypad for easier reaching with your thumb than the standard horizontal equivalent.

QWERTY Keypad: The 40-key QWERTY keypad on the XXtreme is a bit more daunting. Basically, Wolfking took the standard QWERTY keyboard and divided it in half. Then, the first half was stacked on top of the second half and the whole merged entity was cut into a circular formation. This keypad is not as comfortable to use as the Warrior side. The idea behind this layout is that it will be useful for one-handed typing. After getting over the learning-curve of learning the new layout, it is not bad. When playing FPS games, though, I usually have my right hand on the mouse anyway making it difficult to type with one-hand regardless of key layout.

Conclusion: The Wolfking Warrior XXtreme is a mixed bag of sorts. On one side of the coin you have this amazing Warrior keypad which is very useful in keeping stress off one’s left hand while at the same time increasing response time by keeping the important gaming keys close by. On the other side of the coin the user has to deal with a QWERTY pad that is not all that user-friendly and no macro ability. In short, the keyboard is a good gaming solution but it could have been absolutely incredible if its shortcomings were addressed.

Saitek Cyborg Rumble Gamepad Review

Design / Construction: We should start this by saying that the Cyborg Rumble gamepad is big. Like, the original Xbox controller big. Now, for myself this is not an issue – larger controllers fit better in my hands. However, the size could discourage folks with smaller hands. Thankfully, along with being large, the Cyborg Rumble is also very sturdy. With a hard plastic outer shell, the gamepad can take some serious abuse and keep on ‘ticking’.

The pad’s controls can be laid out like both the Xbox 360’s as well as Playstation 3’s gamepads. How is this you ask? Well, Saitek has created a rather ingenious feature in the Cyborg Rumble called the ‘Cyborg Module’. This module contains the left thumbstick and D-pad, and can be removed and rotated about to the gamer’s preferred controller style. Physically, the Cyborg Rumble contains the same number and type of control buttons, sticks, and triggers as the Xbox 360 gamepad does.

The attached USB chord coming off the pad is six feet long. Gamers would be better served by Saitek making the chord a bit longer as the stock six feet did not afford quite enough room to relax back from the PC keyboard/case if you wanted.

Installation / Usage: Technically, you don’t need to install any software with the Cyborg Rumble pad. You can literally plug it into a USB port and start gaming right away. However, if you wish, you may install the Saitek macro software in order to set the Cyborg Rumble’s buttons to specific macros. The macro software included is Saitek’s multi-device macro software that they include with most of their peripherals.

In place of where the Xbox button would be on Microsoft’s gamepad, Saitek has what they call, they ‘FPS Button’. By activating this control, the gamepad assigns default FPS control keys to the buttons/axis on the pad. This is useful when a game you are trying to play does not have native support for gamepads. Though not 100% spot-on, it is usually close enough to play. If you seek totally ‘correct’ control assignment, use Saitek’s macro software.

Another great feature of the Cyborg Rumble is its ‘precision key’. This key can be assigned to any button on the pad and will decrease the sensitivity of any desired axis to enhance the accuracy of small-movements. Basically, if you need to snipe your opponent through a rifle scope, you activate this control to give enhanced accuracy.

The Cyborg Rumble can also be set via the game controller driver panel to ‘X-Mode’, which forces it to emulate (and I use the term loosely) an official Microsoft Xbox 360 PC Gamepad. This is useful for all those ‘Games for Windows’ titles which natively support Microsoft’s PC gamepad.

Saitek also equipped the Cyborg Rumble with Immersion’s vibration technology which is very effective in creating that force feedback sensation gamers crave so. When calibrating the controller in the ‘game controllers’ windows, each button press activates a different test vibration feedback effect. From the vibration of firing a minigun to simulating the rumbling of an engine, this gamepad can do it! Unfortunately, and in no part the fault of Saitek, not too many Windows games support rumble technology at this point. Hopefully that will change as the console generation melds a bit more with the PC crowd.

Conclusion: For a very reasonable $34.95 dollars on the official Saitek website, the Cyborg Rumble gamepad is a really nice PC game controller and will go far in getting that ‘console feeling’ on your desktop machine.

Wonderland Online Alpha Test Looking for Guilds

Wonderland Online is a free to play MMO, having its Alpha Test at the end of the month (March). They are looking for guild to apply and be apart of this test. More info follows.

Official Release:
The Wonderland Online (http://wl.igg.com) Alpha Test will be held at the end of March. This test will be focused on finding and fixing as many bugs as possible. Therefore, IGG will only send out a limited amount of test accounts. IGG would sincerely appreciate any help from game guilds who want to join the test.

Game guilds are alliances of people with similar hardcore gaming habits who often play games together. Players who have a guild and a group of members can sign up for the Alpha Test.

Sign up time:
Mar 18th to Mar 25th
How to sign up:
Send an email to edwin@igg.com
Or post in the Wonderland Forum Guild Zone:
http://wl.igg.com/forum/viewthread.php?tid=782

The email should include the following information:
A: Guild name
B: Number of guild members
C: Guild website
D: Number of Guild members participating in the test
E: Contact email

Arthur C. Clarke Dead at 90

Arthur C. Clarke, inventor, writer, futurist, and all-around brilliant man died today at home in Sri Lanka after complaining of ‘Breathing problems’, according to an AP news release. Clarke was 90 years old.

In honor of this great thinker, I found his 90th birthday reflections and wanted to share them with you. They were recorded in December of 2007.

Antec 900 Gaming Case Review

The 900 is Antec’s premiere gaming case. We got a chance to put it through the motions and hope you find our results helpful in your purchasing decision-making.

Official Case Features:

  • Unique Top mounted 200mm ‘Big Boy’ TriCool exhaust fan to cool the hottest system
  • Perforated front bezel for maximum air intake
  • Two front loaded HDD cages for up to 6 hard disk drives
  • The HDD cages act as air ducts to take air in more efficiently. Optional middle 120mm fan bracket to cool the hottest graphic cards or CPU
  • Two 120mm TriCool blue LED front fans to cool hard disk drives
  • Window side panel comes with an optional 120mm fan mount for maximum VGA cooling
  • Top tray for your MP3 player, digital camera, doodads, etc.
  • Rubber grommeted ports on the rear for liquid-cooling tubes allow you to mount external liquid-cooling hardware
  • Advanced cooling system:
    • 1 top 200mm TriCool fan with 3-speed switch control
    • 1 rear 120mm TriCool fan with 3-speed switch control
    • 2 front 120mm special black TriCool blue LED fans with 3-speed switch control to cool HDDs
    • 1 side (optional) 120mm fan to cool graphic cards
    • 1 middle (optional) 120mm fan to cool CPU or graphic cards
  • 9 Drive Bays
    • External 3 x 5.25′
    • Internal 6 x 3.5′ for HDD, or – External 6 x 5.25′; Internal 3x 3.5′ for HDD, or – External 9 x 5.25
  • Motherboard: Fits micro and standard ATX
  • 7 Expansion Slots
  • Top mounted I/O ports
    • Power and reset buttons
    • 2 x USB 2.0
    • 1 x IEEE 1394
    • Audio In and Out

Construction/Design: Antec’s 900 series gaming case is all about maximizing airflow. It does this by implementing two blue-led 120mm fans in the front of the case which suck air in while an even larger 200mm fan blows air out the top of the case and a 120mm fan blows air out the back. As if this wasn’t enough, Antec provides a VERY easy-to-install snap-in 120mm fan mount on the windowed side-panel. Inside the case there is another 120mm fan mount behind one of the 3.5′ bays. Antec claims this is to help draw additional air over the video card and CPU.

The 900 gaming case also features a very handy control/port array in front of a nifty gadget tray, recessed in front of the top 200mm exhaust fan which you can use to hold an mp3 player or digital camera. The control/IO array is located in front of the aforementioned tray and consists of the power button, reset button, a microphone/headphone jacks, two USB 2.0 ports, and one Firewire port. These are set at a 45 degree angle for easier access.

Antec designed the 900 so that the PSU would sit at the bottom instead of the usual placement of on the case’s ‘roof’. This not only helps get air directly to the PSU via the front 120mm fans, but also makes room for that huge 200mm fan at the top of the case which would otherwise be blocked.

Each of the front 120mm fans is connected to a three-drive 3.5′ drive bay module. These modules slide out through the front and one of them has a mounting for an additional 120mm fan at its rear. The reason for this design instead of the drive bays being independent from the fans is to maximize airflow over the drives. Basically, these modules force air through a ‘tunnel’ over the enclosed drives and into the case. I would have preferred them to have some kind of ‘quick-load’ side-mounting feature instead, as removing/installing them from the front is a bit more labor-intensive.

Overall, the case design is very stylish and functional.

Installation: Prepping the Antec 900 for installation was relatively straight forward. After adding the mobo tray mounts, we attempted to lay in the mainboard only to find that the 8800GTX video card would not fit in the case in its stock configuration. The 3.5′ drive bay with the extra fan mount was blocking it from fitting. So, we switched the drive bays around and the mobo/video card fit with no problem. There is actually quite a bit of wiggle room when compared to many modern gaming cases. One thing that would benefit this case greatly would be a slide-out motherboard tray. This would allow a much easier installation without having to ‘angle it in’ from the side of the case.

Each of the fans has a three-way speed switch but they are connected on very short wires. It is a great feature to have in a stock case, but it would have been nice to have slightly longer wires to place the switch where you wanted, perhaps route them all to the same location or give you enough wire to cut and rewire into a fan-control bay module.

Cable management can be tricky with this case, with the power supply resting on the bottom of the case coupled the bottleneck created by larger video cards. I highly recommend a modular PSU with this case so that you can avoid alot of the issue, not to mention the burden of hiding unnecessary cables ain the . If you do not have a modular PSU, I recommend using some cable ties and careful planning as to where you will place the internal cabling.

Usage: When all the fans are set to ‘high’, including the extra 120mm I placed in the side mount, the case noise is like a pleasant ‘whoosh’, and does not take away from the gaming experience in the least. It is definitely not the quietest case in the world but we have heard many louder ones without the 900’s amount of fans. Changing fan speed is troublesome, as previously stated, due to the length of the fan switch wires, so I just left mine on the highest setting available. Placing my hand over the top of the case, the exhaust air remained cool. And, with the amount of air being blown from the top…lets just say you could use it to dry your hands after washing them, although GamingShogun.com does not recommend getting water or wet hands anywhere near your electronic equipment (Thanks legal team!).

The top tray is extremely useful, as I am one who likes to put a camera or mp3 player on top of my PC while it is synchronizing to the machine. In this case, the recessed tray holds all manner of doodad while helping keep it in one place due to its high-friction rubber bottom.

The first thing I did once getting the case together and ready was to start up Call of Duty IV. I love that game: not only is it graphically very pleasing, but also can be very challenging. Even at its highest settings, the exhaust air only slightly warmed up – a HUGE step up from the airflow in my last PC ‘gaming case’ which belched hot air like Rush Limbaugh on a tirade.

Conclusion: Even with its few quirks such as not having a sliding motherboard tray, this is bar none the BEST gaming case I have ever seen. It is also the most gamer-centric. The Antec 900 will definitely be turning heads at any LAN tournament while also allowing you to overclock your hardware, thanks to its intense cooling.